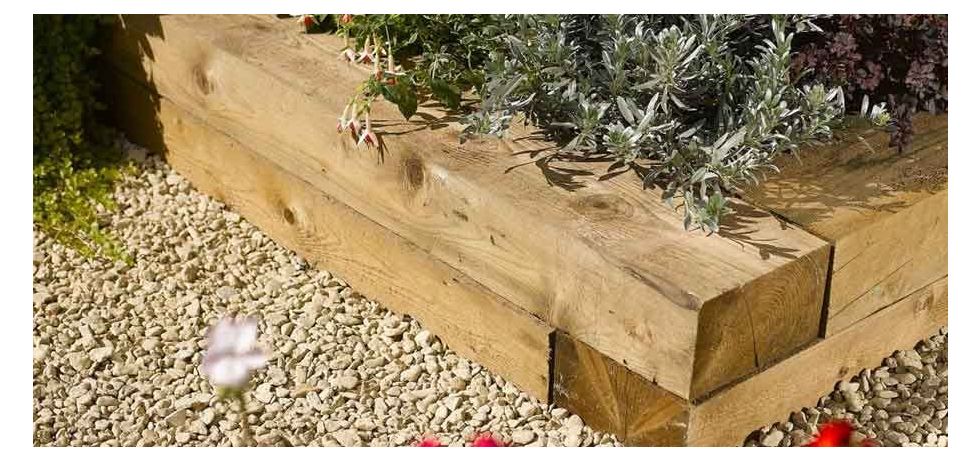
Are you looking to enhance the aesthetics and functionality of your garden? Garden edging with sleepers can be a fantastic solution. Sleepers, also known as landscape timbers, provide a versatile and durable material for creating attractive borders and raised beds. In this step-by-step guide, we will walk you through the process of laying sleepers for garden edging, ensuring your landscape becomes a visual masterpiece.
Plan and Prepare:
Before starting any project, proper planning is essential. Here's what you need to do:
a) Design your layout: Determine the shape, size, and location of your garden edging. Consider the overall style of your garden and any existing elements you want to complement.
b) Measure and mark: Measure the area where you want to install the sleepers, and use marking paint or stakes to outline the borders.
c) Gather your materials: Along with the sleepers, gather the necessary tools such as a shovel, level, saw, drill, screws, landscape fabric, and gravel.
Clear and Level the Area:
Prepare the ground where you will lay the sleepers:
a) Clear the space: Remove any grass, weeds, rocks, or debris from the marked area using a shovel or a garden rake.
b) Level the ground: Use a long spirit level and a shovel to ensure the ground is even and flat. This step is crucial for the stability of the edging.
Install the Sleepers:
Now it's time to lay the sleepers and create your garden edging:
a) Cut the sleepers: Measure and cut the sleepers according to your desired lengths using a saw. Remember to wear appropriate safety gear.
b) Dig trenches: Dig a trench along the marked border, making sure it is slightly wider and deeper than the sleepers.
c) Lay the sleepers: Place the sleepers into the trenches, ensuring they are level and aligned with each other. Use a spirit level to double-check.
d) Secure the sleepers: Drill pilot holes and attach the sleepers together using screws, creating a sturdy and secure edging.
Finishing Touches:
Complete your garden edging project with these final steps:
a) Weed control: Lay landscape fabric within the edging to prevent weed growth. Cut the fabric to fit and secure it in place with landscape staples.
b) Backfill with gravel: Fill the space behind the sleepers with gravel, which improves drainage and adds stability.
c) Add soil: If you plan to create raised beds, fill them with a high-quality soil mix suitable for your plants.
d) Landscaping: Plant your desired flowers, shrubs, or herbs along the garden edging. Consider using a variety of heights, colours, and textures for a visually appealing display.
Conclusion:
By following this comprehensive guide, you can successfully lay sleepers for garden edging, transforming your landscape into an attractive and well-defined space. Remember, proper planning, precise installation, and attention to detail are key to achieving exceptional results. Whether you're a seasoned gardener or a beginner, incorporating garden edging with sleepers can elevate your outdoor space and enhance your home's curb appeal. So roll up your sleeves, get creative, and enjoy the process of beautifying your garden with this versatile and enduring garden edging solution!