Looking to enhance the aesthetics and functionality of your outdoor space? Laying paving slabs is a fantastic way to create a stunning pathway or patio. In this blog post, we will provide you with a detailed step-by-step guide on how to lay paving slabs, ensuring that your project is a success.
Section 1: Planning and Preparation
Assess Your Area: Begin by measuring the designated space where you plan to lay the paving slabs. Consider factors such as the shape, size, and any unique features of the area.
Choose the Right Paving Slabs: Select paving slabs that complement your style and meet your practical requirements. Consider factors like durability, colour, texture, and size options.
Gather the Necessary Tools: Make sure you have all the tools and materials required, including paving slabs, sand or gravel, a spirit level, a rubber mallet, a shovel, and safety gear.
Section 2: Preparing the Ground
Clear and Level the Area: Remove any existing debris or vegetation from the site. Ensure the ground is level by removing high spots and filling in low areas.
Install Edging: Place edging materials, such as concrete or metal strips, along the edges of the area. This helps to maintain the integrity and stability of your paved surface.
Section 3: Creating a Stable Base
Lay the Sub-Base: Spread a layer of crushed rock or MOT Type 1 evenly across the area. Compact it using a plate compactor or by firmly tamping it down to create a solid foundation.
Apply Bedding Material: Spread a layer of sharp sand or a sand and cement mixture on top of the sub-base. Use a straight edge or a screeding tool to ensure a smooth and level surface.
Section 4: Laying the Paving Slabs
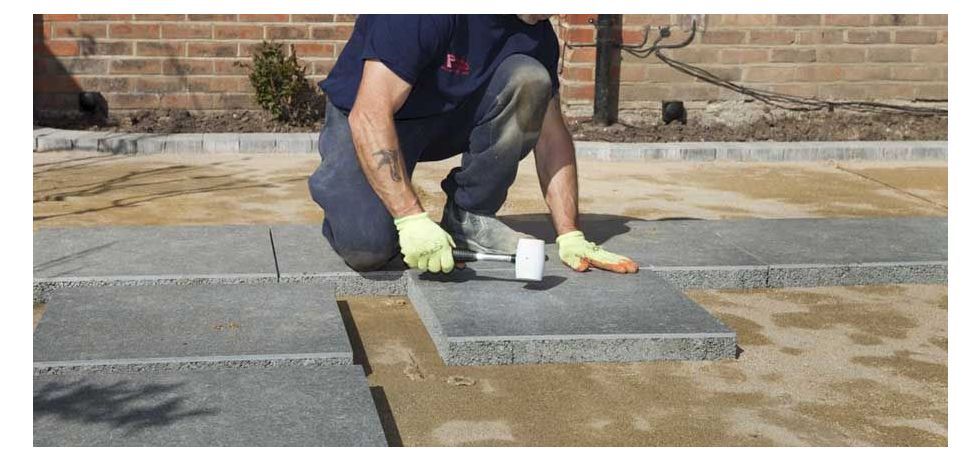
Start from a Corner: Begin laying the paving slabs from one corner of the area. Place each slab firmly onto the bedding material, ensuring it sits level and aligns with the surrounding slabs.
Maintain Even Gaps: Use spacers or small wooden blocks to achieve consistent gaps between the slabs. This allows for proper drainage and prevents unevenness.
Adjust and Tap: Adjust the slabs as necessary to maintain their levelness and alignment. Use a rubber mallet to tap them gently into place, ensuring a secure fit.
Cutting Slabs: If needed, use a diamond blade saw or a chisel and hammer to cut slabs to fit around curves or obstacles. Always wear appropriate safety equipment when cutting paving slabs.
Check and Adjust: Regularly check the levelness and alignment of the slabs as you progress. Make any necessary adjustments to maintain a professional and uniform finish.
Section 5: Finishing Touches and Maintenance
Fill the Joints: Once all the slabs are laid, fill the gaps between them with fine sand. Brush the sand into the joints, ensuring it completely fills the spaces.
Compact and Recheck: Gently compact the paving slabs using a plate compactor or tamper. Recheck the levels and make any final adjustments for a solid and even surface.
Optional Sealing: Consider applying a sealant to protect and enhance the appearance of the paving slabs. Follow the manufacturer's instructions for the appropriate sealant and application method.
Ongoing Maintenance: Regularly sweep the paved area to remove debris and prevent weed growth. Address any issues promptly, such as releveling or replacing damaged slabs, to maintain the longevity and beauty of your paved surface.
Conclusion:
By following this step-by-step guide, you'll be well-equipped to lay paving slabs with confidence. Remember to plan carefully, prepare the ground thoroughly, and take your time during the installation process. With proper execution and maintenance, your beautifully laid paving slabs will transform your outdoor space into a true oasis.